
How To Fit A Belfast Sink Step-by-Step
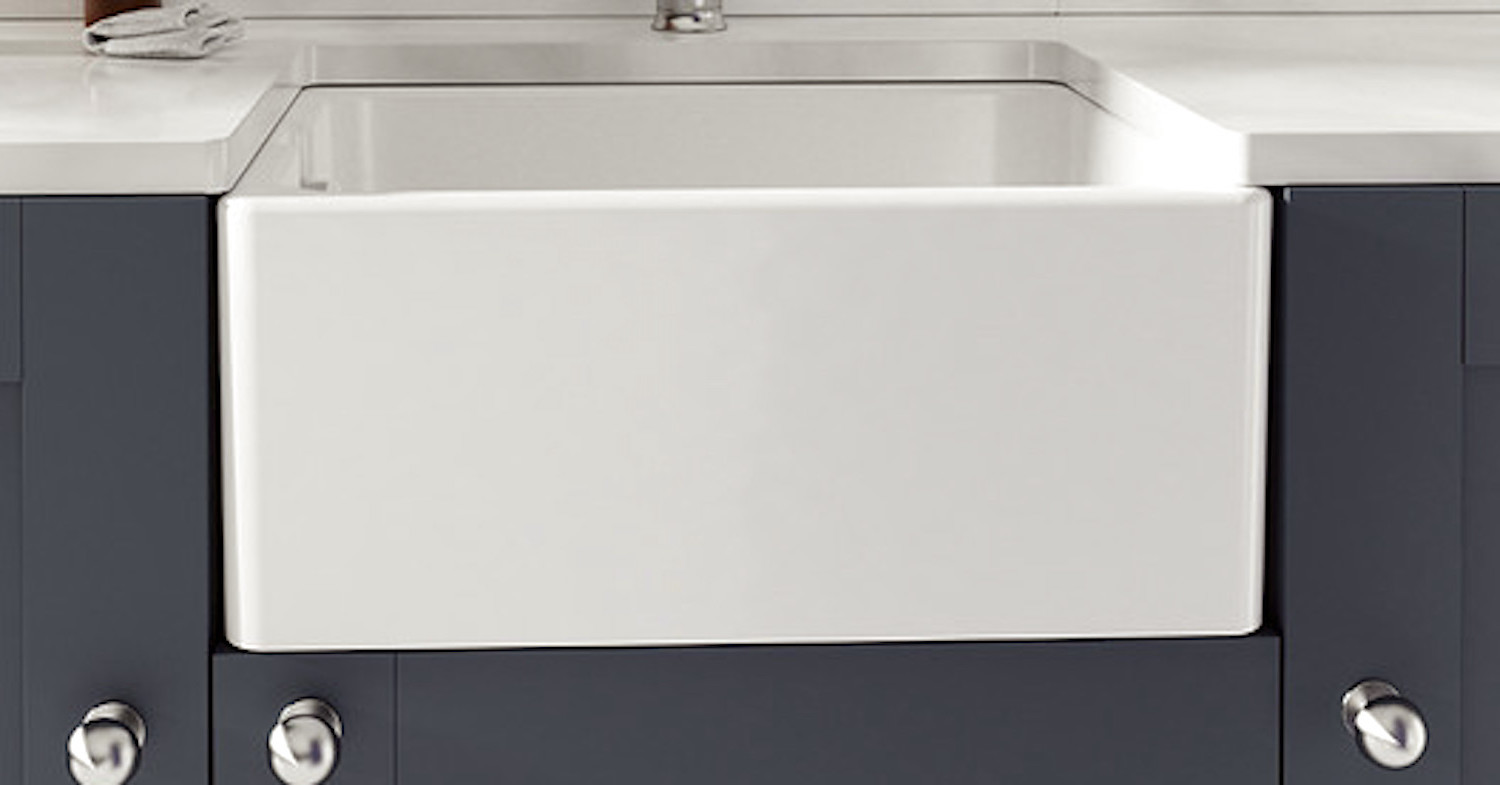
Belfast sinks, with their timeless aesthetic and practicality, continue to be a popular choice among homeowners.
Synonymous with quality and longevity, these sinks not only bring a touch of classic style but also promise durability and functionality.
However, installing a Belfast sink is a task that requires careful preparation and meticulous execution.
This comprehensive guide will navigate you through the process, ensuring your Belfast sink not only looks great but also performs efficiently for years to come.
Click here to view our range of Belfast Sinks for sale.
A Comprehensive Guide on How to Fit a Belfast Sink
1. What You'll Need to Fit the Sink
Installing a Belfast sink isn't overly complicated, but it does require the right tools and materials.
To ensure a smooth installation process, you'll need a spirit level, a saw, tape measure, silicone sealant, a wrench, and plumbing fixtures.
Having all these items at hand before starting the project will save you time and allow for a more efficient workflow.
It's important to note that you may also need additional tools based on your specific sink model and kitchen setup.
2. Preparing for Installation
Before you dive into the actual installation, there are a few crucial preparatory steps.
Firstly, deciding where to position your Belfast sink is paramount.
The ideal location is often between the dishwasher and the main cooking area for ease of use. You also need to measure your sink and cabinet space accurately.
This will ensure the sink fits well and the plumbing connections are properly planned and executed.
Bear in mind the weight of the Belfast sink; the supporting cabinet must be sturdy enough to hold it, especially when full of water.
Click here to view our range of Belfast Sink Waste Kits.
4. Creating the Support for the Sink
Belfast sinks are known for their weight, so creating a supportive and stable base is crucial.
Start by building a support frame using sturdy materials like hardwood or metal brackets, which will cradle the sink and bear its weight.
Ensure the support is level and at the correct height, considering the thickness of the worktop that will sit above.
Use your spirit level to ensure the evenness of your structure.
A well-built support frame will make the rest of the installation easier and increase the lifespan of your sink setup.
5. Cutting the Countertop
Once your support is in place, the next step is to cut the countertop to accommodate the sink.
Measure your sink's dimensions, adding an extra allowance for the lip that sits on the worktop's surface.
Mark these measurements clearly on the countertop before making any cuts.
Use a saw suitable for your countertop material and ensure it's sharp enough to provide a clean, precise cut.
This step requires a steady hand and focus, as an incorrect cut may result in having to replace the entire countertop.
6. Installing the Sink
Now that you've prepared the base and cut the countertop, you're ready to install the Belfast sink.
Carefully lift the sink into place, ensuring it fits snugly within the cutout and rests securely on the support frame.
Double-check that the sink is perfectly level, adjusting the support if necessary.
Being meticulous at this stage will prevent problems in the future, like uneven drainage or a wobbly sink.
Click here to view our range of Taps for Belfast Sinks for sale online.
7. Making the Plumbing Connections
With the sink securely in place, it's time to connect the plumbing.
The process involves connecting the sink to the water supply and waste pipe, ensuring a tight and leak-free fit.
This step can be quite complex, depending on your existing plumbing system, and may require specialist tools.
If you're unsure about any aspect of this step, consider hiring a professional plumber.
It's crucial that the plumbing is correctly installed to prevent leaks, which could damage your kitchen units.
8. Fitting the Worktop and Sealing
With the sink and plumbing installed, you can now fit the worktop.
This involves measuring and cutting the worktop to fit around the sink.
Remember to leave space for the lip of the sink to sit on the surface of the worktop.
Once the worktop is in place, seal around the edges of the sink with a silicone sealant.
This will prevent water from seeping in and causing damage.
9. Maintenance and Care
Your Belfast sink is now installed and ready to use. However, the job isn't finished just yet.
Regular maintenance is essential to keep your sink looking its best and functioning correctly.
This includes cleaning the sink with non-abrasive cleaners, regularly checking the sealant for any signs of wear and tear, and promptly fixing any leaks to prevent water damage.
Click here to view our range of Accessories for Belfast Sinks.
10. Troubleshooting Common Installation Problems
Even with the best preparations, you may encounter some issues during the installation process.
Some common problems include uneven sinks, leaks, or a worktop that doesn't fit.
But don't worry - most of these issues have simple solutions.
For instance, an uneven sink is often due to an uneven support base, which can be fixed by adjusting the support.
Leaks, on the other hand, are usually down to problems with the plumbing and might require the help of a professional plumber.
How Do You Fit A Belfast Sink Into A Solid Wood Worktop?
Fitting a Belfast sink into a solid wood worktop can be a rewarding DIY task that can add a touch of traditional charm to your kitchen.
Here are the steps to accomplish this:
- Measure Twice, Cut Once: Before you begin cutting into your worktop, ensure that you have taken precise measurements of the sink. Remember to account for the lip of the Belfast sink which rests on the surface of the worktop. Make sure to mark these dimensions accurately on the worktop using a pencil.
- Cutting the Worktop: Once you have marked the dimensions, the next step is to cut the worktop to create a hole for the sink. Using a jigsaw or a circular saw, follow the marked lines to cut out the section. It's recommended to use a fine-toothed blade to prevent splintering of the wood. Always ensure your safety by using proper personal protective equipment.
- Preparing the Worktop: After the cut, it's time to prepare the worktop for installation. Sand the edges of the cut-out to ensure a smooth finish and then apply a layer of waterproof wood sealant. This helps to prevent water damage and prolongs the lifespan of the wood.
- Installing the Sink: Now, carefully place the sink into the cut-out, ensuring that it fits snugly and is evenly supported by the surrounding worktop. It's important to use a spirit level to check the sink is level to avoid any future drainage issues.
- Sealing the Sink: After your sink is in place, use a silicone sealant around the edges where the sink meets the worktop. This is an essential step to ensure water can't seep into the cut wood, which could cause damage over time.
- Finishing Touches: Finally, wipe away any excess sealant and let it dry as per the manufacturer's instructions. Once it's dry, your Belfast sink is ready to be connected to the plumbing.
As with any DIY task, if you're unsure at any stage, it's best to consult with a professional.
While installing a Belfast sink can be a DIY task, it does require specific tools and some knowledge of carpentry and plumbing.
Advice from an Experienced Kitchen Fitter and Kitchen Manufacturer
I have been fitting and manufacturing kitchens for well over twenty years now.
So, I guess you could say I have some experience and expertise when it comes thew kitchens.
One of the most common calls I get from people needing help with their kitchens is when a DIY attempt has gone horribly wrong.
So, my advice to you would be that unless you have a lot of DIY experience fitting it might be safest to get a plumber to fit your Belfast sink.
Final Notes On How to Fit Your Kitchen Sink
Installing a Belfast sink may seem like a daunting task, but with careful preparation, the right tools, and a bit of patience, it's a project that's certainly achievable.
Whether you're a seasoned DIY enthusiast or a first-time installer, this guide should help you understand the process and navigate any challenges you may encounter.
Once installed, a Belfast sink is not only a stylish addition to your kitchen but also a functional one, promising to serve you for many years to come.
More Belfast Sink Related Posts from the JMT Trade Blog
- What is a Belfast Sink?
- How to Clean a Belfast Sink
- What is the Difference between a Belfast and a Butler Sink?
- How to Drain Dishes With a Belfast Sink
- What is the Belfast Sink Weight?
- What is a Butler Sink?

